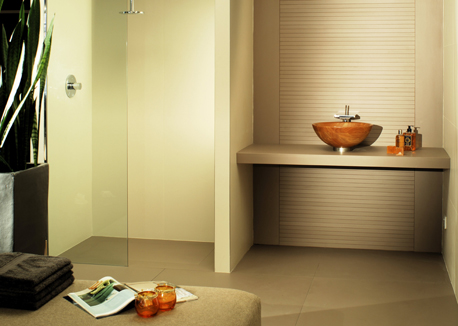
There is no question that for the “wet areas” of the home—the kitchen,
bath and foyers—ceramic tile has been and will continue to be the
surfacing material of choice. Durable, easy to clean and maintain, and
available in a multitude of sizes, shapes, textures, designs and
colors, it is one construction product offering that always seems to
make sense. And when it’s professionally installed with
state-of-the-art systems consisting of a fast-curing adhesive,
waterproofing that protects the substrate and a high-performance,
nonporous grout that comes in a full spectrum of non-fading colors,
virtually any ceramic tile project will last for decades.
On top
of that, many of today’s best tiles and installation systems contain
antimicrobial components such as Microban. This means your fantastic,
long-lasting installation helps to prevent mold, mildew and harmful
bacteria strains. It all sounds too good to be true!
So what’s
next? With all of this progress and upgrading, what could possibly be
more beneficial for the kitchen and bath relative to ceramic tile
installations? The answer is a product category that has received high
marks in those countries around the world that consume a greater amount
of ceramic tile per capita than we do in the United States: thin
porcelain tiles.
WHAT ARE THIN TILES?

What are
these thin tiles, exactly? Most, which recently have been successfully
introduced throughout Europe and the Middle East, are durable yet
ultra-thin large-format, fully rectified porcelain tiles. Many measure
less than 1/5 in. thick and still represent the perfect blend of
technical finesse and design aesthetic. Some are offered in formats as
large as 24 in. x 24 in., and all are lightweight and ideal for use
both as indoor wall tile or in any kitchen or bath flooring project.
Most notably, the cost of removing or demolishing existing floor
coverings can be eliminated, since this unique category of tile can be
directly installed over the previous floor or wall product.
But what about installation?
THICK AND THIN
First,
some history. More than 50 years ago, when tile was called for in the
home, a thick mortar bed had to be used to ensure a strong
installation. Housing construction had to be set up to accommodate this
procedure. Translated, this meant rooms such as the “wet areas” had to
be built with a recessed substrate. Over time, installation procedures
changed, offering an alternative process to the thick mortar bed
method. For the most part, since the adoption of those changes, most
tile installations now utilize the “thinset method,” which, in very
condensed wording, replaces the thick mortar bed with an efficient,
thinner stratum of bonding material.
This process, which was invented by Dr. Henry M. Rothberg, founder and chairman emeritus of Laticrete International, Inc.,
revolutionized tile installation worldwide. For new construction, areas
that were formerly designated for thick mortar beds and required being
recessed to a lower level than surrounding substrates could now be on
the same plane. The amount of weight on the substrate when the thinset
method was put in place was much less than that when a thick mortar bed
was used.
With today’s thinner tiles, the height from substrate
to surface is shortened—thus minimizing the need for “shaving” door
bottoms and “adjusting” thresholds—and in certain cases, if the correct
installation system is used, thin tiles may be installed right over
existing tile. To ease the challenges associated with installing these
innovative porcelain tiles, the following installation systems can be
specified.

SUBSTRATE PREPARATION
The
main challenge for installers is to make sure that the substrate is
extremely flat so as to achieve the required coverage on the back of
the thin porcelain tiles. The goal is to attain at least 95 percent
continuous adhesive mortar coverage (with no voids) for interior wet
area and exterior applications, and at least 80 percent coverage for
interior dry areas. Therefore, the flatter the substrate, the easier it
will be to create the desired coverage for the large-format thin
porcelain tiles. Self-leveling underlayments or polymer-fortified
leveling mortars can be utilized to properly prepare the substrates. In
addition, the inclusion of a thin load-bearing waterproofing membrane
is also a good idea for wet area applications to protect adjacent
spaces and areas below the tile installation.
THINSET MORTAR
Once
the substrate is prepared, the thin porcelain tiles are typically
installed with a high-performance polymer-fortified thinset mortar
specially designed for large-format tiles. These adhesive mortar types
include non-sag properties and help the installer to achieve the
required coverage. Some tile types are supplied with a mesh/resin
backing. Although the same high-performance polymer-fortified thinset
mortar can be used for tiles with a mesh/resin backing, at times an
epoxy adhesive may be better suited.
In all cases, maximum
adhesive mortar coverage in accord with the appropriate ANSI
requirements must be achieved in order to prevent the tiles from
cracking. Care must also be taken when simply removing a tile to
inspect the thinset mortar coverage during the installation process and
while the mortar is still wet. The tiles can crack during this process.
GROUTING AND JOINTS
Since the tiles are so
thin, extra attention must be given to “clean out” any adhesive mortar
left in the joints during the installation in order to facilitate
grouting and the acceptance of enough grout within the grout joint. In
most cases, half the depth of the grout joint should be available to
receive the grout. For 1/8-in.-thick porcelain tile, that would be only
1/16 in. This may not be enough to allow the grout to remain in place.
Therefore, the entire depth of the tile should be free of adhesive in
the joints to receive the grout.
Joints scheduled to act as
movement joints should also be cleaned out of all adhesive mortar and
grout in order to receive a bond breaker tape and the suitable sealant
so as to allow the movement joint to function correctly. Use a suitable
flexible silicone sealant to treat the movement joints. Follow standard
industry guidelines for movement joints in accord with the Tile Council
of North America’s movement joint details and information EJ-171.
MAKING SENSE
Because
today’s thin tiles are half the weight of their more conventional
counterparts, which generally measure roughly 1/2 in. in thickness,
their use can result in a significant load-bearing reduction on any
building structure. Thin tiles also make economic sense, as they save
precious time and labor expense relative to removing the existing wall
or floor surface prior to the actual installation.
—Arthur
Mintie is director of technical services for Laticrete International,
Inc., a family-owned business dedicated to innovative tile and stone
installation systems. For more information on the company, visit www.laticrete.com.


